Low Poly
What is low poly design? It is a simplification of the overall form and all of the details and colors into simple geometric shapes. In the two examples below the simple geometric shapes are triangles. I have posted two different examples of low poly designs below. But you don't have to use these examples. I just want you to try simplifying a picture of your choosing. You can trace the picture or draw free hand or use one of the ideas below or come up with another solution. I do want you to start with an inspiration picture though. Both of the examples below start by defining the outline using straight lines. Then they start to fill in the outlines with smaller shapes.
To Do:
Select an inspiration image
Create a low poly version of that picture using any technique that you have available to you.
Upload a picture of your low poly solution and also a link to your inspiration image.
To Do:
Select an inspiration image
Create a low poly version of that picture using any technique that you have available to you.
Upload a picture of your low poly solution and also a link to your inspiration image.
|
|
|
Portraits
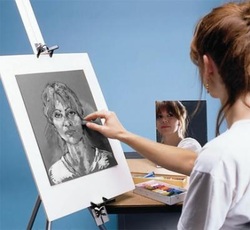
Each day we will begin class with the instructional video. Your grade sheet contains the link to these videos, should you need to review. You must stay focused on your own work for this unit or you risk falling behind. Each day is planned out to get the maximum production time. Use each minute as if your grade depends on it.
For each day you will watch a video from the links on the introduction page. You will then sketch the facial feature covered in the video complete with shading up to ten times. Begin with the nose, then move on to the mouth and then the eyes. On the fourth day, we will watch two videos on drawing faces and begin sketching the entire face. Once 5 ten minute sketches of the face have been completed, you will be ready to begin your final self portrait. This self portrait will take you up to four class days to complete.
Use all of what you have learned in this course up to this point about observing and drawing what you see, not what you remember, the value scale, shading, and textures.
This portrait and all of the sketches are due before the end of next week. If you complete one step each day, you will have plenty of time to complete your portrait.
|
Step One-- View the video on drawing a nose. Using your mirror, observe your nose in the mirror. Sketch your own nose Nine times. Study your nose in the mirror as you make each sketch. Look at your nose from different angles for each sketch. You will also be expected to include value changes for this step. Remember your nose should have shading. It is not a flat shape. Reflect on the video demonstrating good nose drawing.
http://www.youtube.com/watch?v=lb1WrQp2EAI http://www.youtube.com/watch?v=ECeu5JR7Zzg |
Step Two--View the video on drawing mouth, lips and teeth also on the introduction page. Using a mirror again, observe your mouth in the mirror. Sketch your own mouth nine times. Study your mouth in the mirror as you make each sketch. Hold your mouth in different positions for each of the sketches. You will also be expected to include value changes for this step. Remember, your teeth should also have shading. They are not flat shapes. Reflect on the video demonstrating a good mouth drawing.
|
Step Three--View the video on drawing realistic eyes. You will still need a mirror for this step. Study your eyes in the mirror. What is the shape created by the edge of the top eyelid and the bottom eyelid? Sketch both eyes eight times. Remember to observe closely the shape of your eyes. There will be no circle or oval shaped eyes in your mirror. Your eyes have a unique shape and that should be evident in your drawings. Add dark values and adjust the lightest values. This will transform the shapes into forms. Your eyes and eyelids are not flat shapes. Adding value changes where you observe them to be in the mirror. Include your eyebrows and the bridge of your nose. Eyelashes should reflect what you are observing in the mirror and not what you think they look like.
|
Step Four--View Both video's on drawing faces. The video on the first link begins with adding guide lines to help arrange your facial features. Try this on at least two of your sketches. You may find it to be very helpful. Before you make any marks, look at your face in the mirror. If you are making reference marks, imagine a circular shape starting at the top of your head. The bottom edge of the circle goes under your nose. Draw this round shape on your page. The shape below the circle should be like an outline of your face from the middle of one ear the the middle of the other ear. This shape mainly describes your jaw line. Begin adding features starting with your eyes near the bottom of the first circular shape.
Complete 5 ten minute sketches including all facial features and accurate shading. Be sure to also indicate where your hair should be. These sketches should have very dark values, mid values and lights. The second video link shows another way of starting a sketch using very few lines and no real outlines. While this video is a good example of how to place features by starting with the left eye and finding the values around the eyes, it would be better if the face had more value changes especially under the eye on the right side of the screen. The values in your sketch need to be developed most like those in the first video. Be sure to review the rubric and when these 5 ten minute sketches are complete, move on to step 5. |
| portrait_drawing_rubric.docx |
